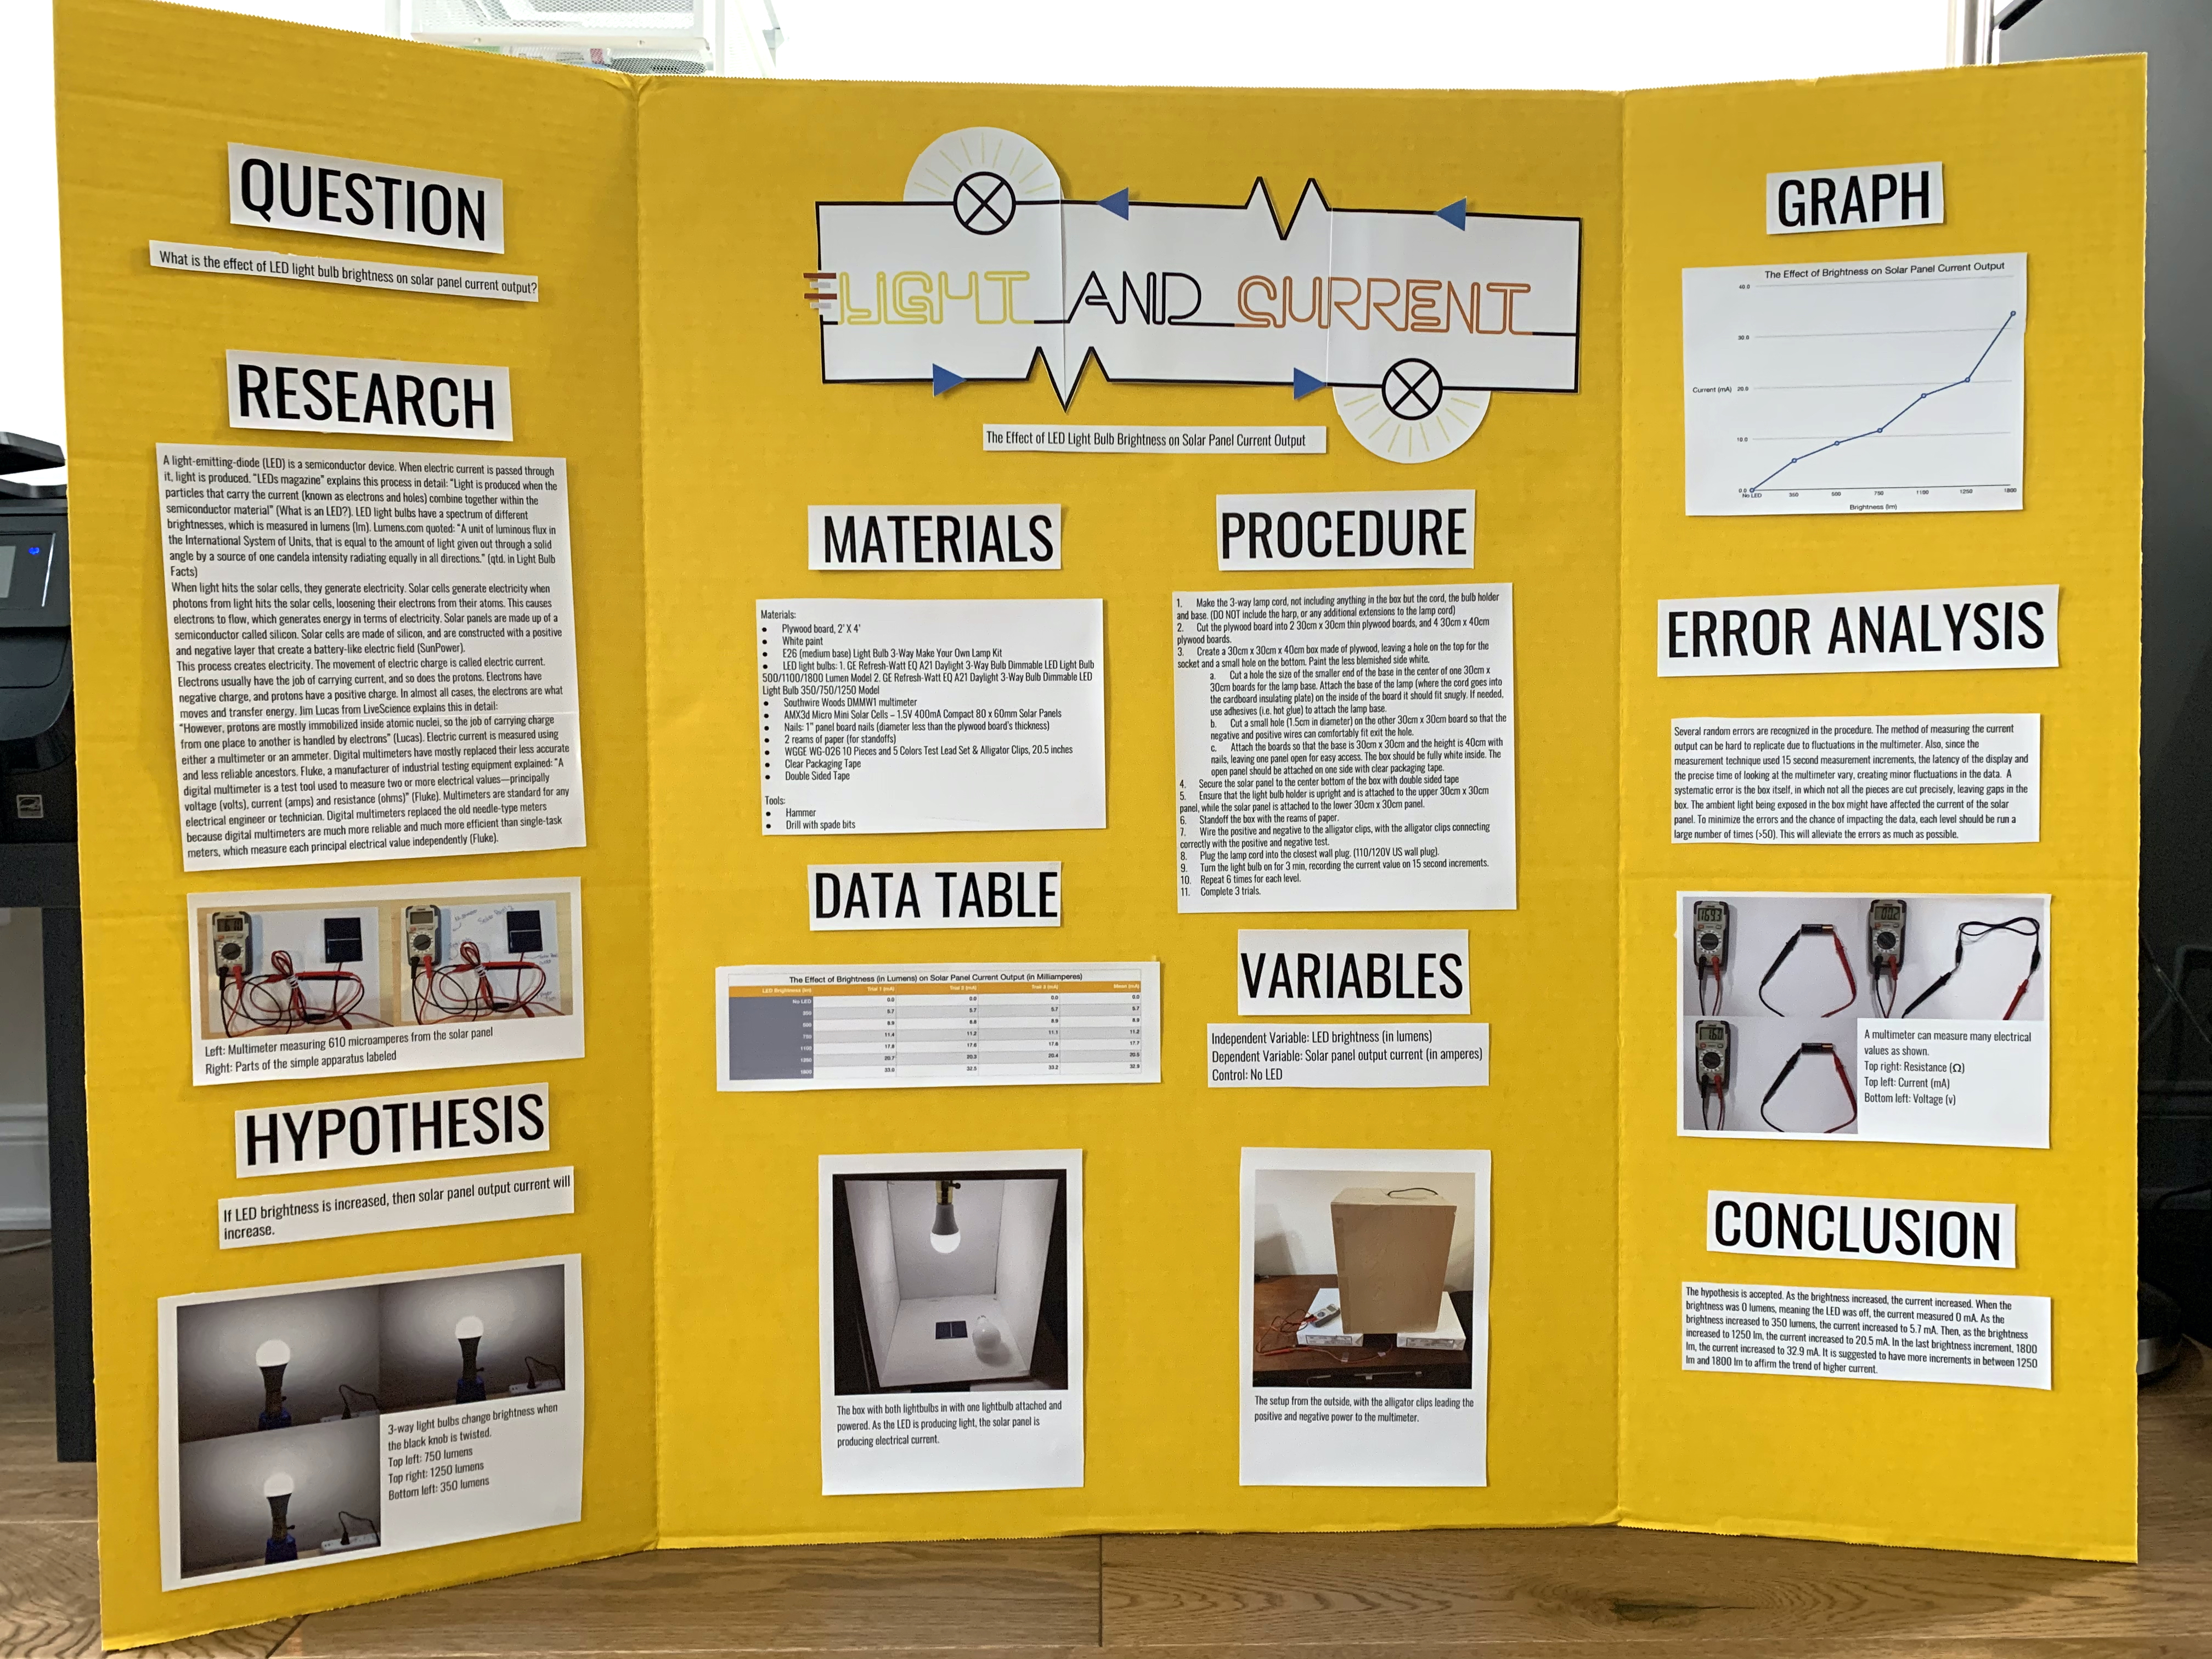
Light and Current (The Effect of LED Light Bulb Brightness on Solar Panel Current Output
Abstract:
The Effect of LED Light Bulb Brightness on Solar Panel Output Current:
The purpose of this project was to determine what effect LED lightbulb brightness had on solar panel current output. The hypothesis was if LED brightness is increased then the solar panel output current will increase. The control was no LED and some of the constants were the LED light bulb color temperature, the LED manufacturer, LED base (medium base/E26), the solar panel, multimeter model. The independent variable was the LED brightness in Lumens and the dependent variable was the solar panel output current in milliamperes. The current outputted by the solar panel was measured for 3 minutes on 15-second intervals with a multimeter. The apparatus used in the experimentation was a 30 x 30 x 40cm plywood box painted white inside. A 3 way LED lightbulb holder was placed on the top of the box and the solar panel was placed at the bottom. 2 3-way LEDs were used in the experiment. In the end, the hypothesis was accepted. As the brightness increased, the current increased. When the brightness was 0 lumens, meaning the LED was off, the current measured 0 mA. Then, as the brightness increased to 1250 lm, the current increased to 20.5 mA. In the last brightness increment, 1800 lm, the current increased to 32.9 mA. It is suggested for the box itself to be more sealed to make the ambient light intensity and brightness more constant. It is also suggested to calibrate the LED brightness manually for more precision.
Bibliography/Citations:
No additional citationsAdditional Project Information
Research Plan:
Title:
Light and Current (The Effect of LED Light Bulb Brightness on Solar Panel Current Output)
Question: What is the effect of LED light bulb brightness on solar panel output current?
Hypothesis: If LED brightness is increased, then solar panel output current will increase.
Materials:
Plywood board, 2’ X 4’, White paint, E26 (medium base) Light Bulb 3-Way Make Your Own Lamp Kit, LED light bulbs: 1. GE Refresh-Watt EQ A21 Daylight 3-Way Bulb Dimmable LED Light Bulb 500/1100/1800 Lumen Model 2. GE Refresh-Watt EQ A21 Daylight 3-Way Bulb Dimmable LED Light Bulb 350/750/1250 Model, Southwire Woods DMMW1 multimeter, AMX3d Micro Mini Solar Cells – 1.5V 400mA Compact 80 x 60mm Solar Panels, 1’’ panel board nails (diameter less than the plywood board’s thickness), 2 reams of paper (for standoffs), WGGE WG-026 10 Pieces and 5 Colors Test Lead Set & Alligator Clips, 20.5 inches, clear packaging tape, double sided tape
Procedure:
1. Make the 3-way lamp cord, not including anything in the box but the cord, the bulb holder and base. (DO NOT include the harp or any additional extensions to the lamp cord)
2. Cut the plywood board into 2 30cm x 30cm thin plywood boards, and 4 30cm x 40cm plywood boards.
3. Create a 30cm x 30cm x 40cm box made of plywood, leaving a hole on the top for the socket and a small hole on the bottom. Paint the less blemished side white.
a. Cut a hole the size of the smaller end of the base in the center of one 30cm x 30cm boards for the lamp base. Attach the base of the lamp (where the cord goes into the cardboard insulating plate) on the inside of the board it should fit snugly. If needed, use adhesives (i.e. hot glue) to attach the lamp base.
b. Cut a small hole (1.5cm in diameter) on the other 30cm x 30cm board so that the negative and positive wires can comfortably fit exit the hole.
c. Attach the boards so that the base is 30cm x 30cm and the height is 40cm with nails, leaving one panel open for easy access. The box should be fully white inside. The open panel should be attached on one side with clear packaging tape.
- Secure the solar panel to the center bottom of the box with double sided tape
- Ensure that the light bulb holder is upright and is attached to the upper 30cm x 30cm panel, while the solar panel is attached to the lower 30cm x 30cm panel.
6. Standoff the box with the reams of paper.
7. Wire the positive and negative to the alligator clips, with the alligator clips connecting correctly with the positive and negative test.
8. Plug the lamp cord into the closest wall plug. (110/120V US wall plug).
9. Turn the light bulb on for 3 min, recording the current value on 15 second increments. 10. Repeat 6 times for each level.
11. Complete 3 trials.
Data Analysis:
Solar panel output current will be measured for 3 min with data taken at 15 second intervals. There are 6 replicates and 3 trials. A visual representation of the total mean data will be represented with a linear graph brightness of the lightbulb (lm) on the x-axis and current output (mA) on the y-axis.
Risk Analysis:
Electrical safety and sharp instrument safety procedures should be followed at all times
Works Cited
Fluke. “What Is a Digital Multimeter?” Fluke, 22 July 2019,
www.fluke.com/en-us/learn/best-practices/measurement-basics/electricity/what-is-a-digital-multimeter.
Lucas, Jim. “What Is Electric Current?” LiveScience, Purch, 1 Mar. 2016,
www.livescience.com/53889-electric-current.html.
“What Is an LED?” LEDs Magazine, 18 Dec. 2015,
www.ledsmagazine.com/leds-ssl-design/materials/article/16701292/what-is-an-led.
“Light Bulb Facts: The Meaning of Lumens.” Lumens.com,
www.lumens.com/how-tos-and-advice/light-bulb-facts.html.
SunPower. “What Is Solar Energy and How Do Solar Panels Work?” SunPower, 26 June 2019,
https://us.sunpower.com/what-solar-energy-and-how-do-solar-panels-work.
All photos by entrant

